How to Program Your LED Screen with NovaLCT
Programming an LED screen may seem daunting at first, but with the right tools and guidance, it becomes a straightforward process. One of the most reliable tools for this task is Nova LCT, a software developed by Novastar, specifically designed for managing and configuring LED screens. This guide will walk you through the process of programming your LED screen using Nova LCT, ensuring your display is set up correctly and ready to impress.
Why Use Nova LCT?
Nova LCT is a powerful software that allows you to configure and manage your LED screen’s settings with precision. It’s compatible with a variety of LED screens and is particularly known for its user-friendly interface and advanced features. However, it’s important to note that Nova LCT is only available for Windows computers, so you’ll need access to a Windows device to complete the setup.
Step 1: Download and Install Nova LCT
The first step in programming your LED screen is to download the Nova LCT software. Here’s how you can do it:
Visit the Novastar Website: Navigate to Novastar’s official website and click on the “Downloads” section.
Find the Software: Look for the latest version of Nova LCT compatible with Windows.
Download the Software: Click on the download link to start the process. Once downloaded, follow the on-screen instructions to install the software on your computer.
By installing Nova LCT, you’re equipping your system with the necessary tools to communicate with and manage your LED screen effectively.
Step 2: Connecting and Recognizing the Processor
After installing Nova LCT, the next step is to ensure that your LED screen’s processor is correctly recognized by the software. Follow these steps:
Open Nova LCT: Launch the Nova LCT software on your Windows computer.
Recognize the Processor: The software may initially display a “No Hardware” message. This is a normal indication that the processor has not yet been recognized.
Connect the Processor: Ensure your LED screen is properly connected to your computer. The “No Hardware” message should disappear once the processor is recognized by Nova LCT.
User Login: Click on “User Advance” in the software. When prompted for a password, enter “admin” to access the advanced settings.
Screen Configuration: Click on the “Screen Configuration” option to proceed with setting up your LED screen.
Step 3: Configure the Sending Card and Factory Settings
With the processor recognized, you can now proceed to configure the sending card and restore factory settings:
Verify Processor Recognition: Before moving forward, ensure that your processor is still recognized by Nova LCT. This is crucial for the next steps.
Navigate to Sending Card Tab: In the screen configuration menu, go to the “Sending Card” tab.
Restore Factory Settings: To ensure a fresh start, it’s advisable to restore the factory settings of the sending card. This resets any previous configurations and prepares the system for your specific setup.
Step 4: Set Up Screen Connections
Now comes the critical part of configuring the screen connections. This step involves specifying the layout of your LED screen and ensuring the correct dimensions are applied:
Screen Connections Tab: Navigate to the “Screen Connections” tab in Nova LCT.
Configuration: Click the “Configure” button located at the top right of the screen. This will open the configuration settings where you can enter the details of your screen.
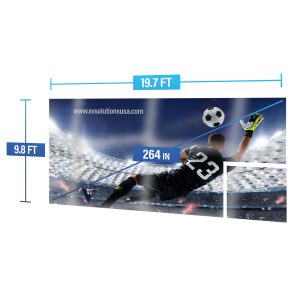
Enter Columns and Rows: You’ll need to enter the number of columns and rows that make up your LED screen. For this guide, we’ll use an example of a 5×3 setup. Depending on the type of panels you’re using, this number may vary.
Panel Size Configuration: The panel size must be configured according to the specific type of LED panels you are using. For instance, if you’re using 3.9mm panels, you’ll enter 128 by 128 in the corresponding fields. This ensures that the software accurately represents the physical layout of your screen.
Apply Settings: Once you’ve entered the correct dimensions, click “Apply to the Entire Row” to ensure that these settings are uniformly applied across your display.
Step 5: Drawing the Screen Layout
With the basic settings in place, you can now draw the layout of your screen using the diagrams provided by Nova LCT:
Start Drawing: Begin by drawing your screen layout within the software, using the diagram as a reference.
Multi-Port Configuration: If your setup uses more than one port, you can select the desired port from the list and continue drawing the layout. This allows for a more complex configuration, accommodating multiple input sources.
Finalize and Send Configuration: Once your screen layout is complete, and you’ve double-checked all settings, click “Send to HW” (Hardware) to apply the configuration to your LED screen.
Final Checks and Ready to Use
At this point, your LED screen should be fully configured and ready to use. Nova LCT will send the finalized settings to your hardware, ensuring everything is correctly aligned and functioning as intended. Before you wrap up, it’s a good idea to perform a final check to ensure that the display is showing content as expected.
Conclusion
Programming your LED screen using Nova LCT might seem like a technical task, but by following these steps, you can easily set up and configure your screen to deliver high-quality visuals. Whether you’re setting up a screen for a live event, a business display, or any other application, Nova LCT provides the tools you need to get the job done efficiently.
For more information or if you need further assistance, feel free to contact us. We’re here to help you transform your space with the latest in LED screen technology.
At SV Solutions, we recognize the significance of
crafting unforgettable experiences through seamless events.