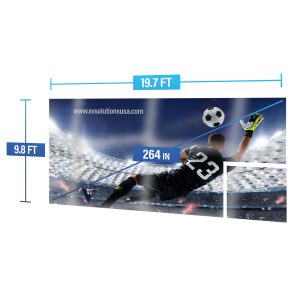
How to Send Signals to Your LED Screen
Step 1: Understanding the Basics
Before diving into the connections, it’s crucial to understand the basic components involved in setting up an LED screen:
- LED Panels: These are the display units that make up the screen.
- Video Processor: This device processes the video signal and distributes it to the LED panels.
- Cables: Various cables such as Ethernet, HDMI, SDI, and DP (DisplayPort) are used to connect the components.
Step 2: Connecting the LED Panels
LED panels are connected in a daisy chain configuration using Ethernet cables. This method ensures that the signal flows from one panel to the next, creating a seamless display.
- Daisy Chain Configuration:
- Connect one end of an Ethernet cable to the output port of the first panel.
- Connect the other end to the input port of the next panel.
- Repeat this process until all panels are connected in a chain.
This setup allows the signal to be transmitted from the first panel to the last, ensuring that each panel receives the necessary data to display the image correctly.
Step 3: Connecting to the Video Processor
The video processor is the central hub that sends the video signal to the LED panels. It processes input signals from various sources and distributes them to the panels via Ethernet cables.
- Connecting Ethernet Cables:
- Connect an Ethernet cable from the output port of the video processor to the input port of the first LED panel in the daisy chain.
- This allows the video processor to send the processed signal to all the connected panels.
Step 4: Input Signal to the Video Processor
To display content on your LED screen, you need to connect a video source to the video processor. This can be done using different types of cables, depending on your setup and the type of signal you want to send.
HDMI or SDI Cable:
- For a simple setup, use an HDMI or SDI cable to connect your video source (such as a computer, media player, or camera) to the video processor.
- HDMI cables are commonly used for high-definition signals, while SDI cables are preferred for long-distance transmission and professional setups.
- DP (DisplayPort) Input:
- For more advanced setups, a DP input can be used. DisplayPort supports higher resolutions and refresh rates, making it ideal for demanding applications.
- Connect one end of the DP cable to your video source and the other end to the video processor.
Step 5: Powering Up and Configuration
Once all the connections are made, power up your LED panels and video processor. The panels should start receiving the signal from the video processor, displaying the input from your video source.
Power On:
- Ensure all LED panels are connected to a power source and switched on.
- Turn on the video processor and any connected video sources.
Configuration:
- Use the video processor’s interface to configure the display settings. This may include adjusting resolution, brightness, contrast, and other parameters to ensure optimal display quality.
- Some video processors come with software that allows for more advanced configuration and control. Refer to the user manual for specific instructions on how to use these features.
Enjoying Your LED Display
With the setup complete, you should now have a stunning LED display ready to showcase your content. Here are a few tips to ensure you get the best performance from your LED screen:
- Regular Maintenance: Regularly check connections and clean the panels to ensure consistent performance and longevity.
- Optimal Settings: Experiment with different display settings to find the best configuration for your environment and content.
- Content Quality: Use high-quality content that matches the resolution and capabilities of your LED screen for the best visual experience.
Troubleshooting Common Issues
Even with a straightforward setup, you might encounter some common issues. Here’s how to address them:
No Signal on the Panels:
- Check all cable connections to ensure they are secure.
- Verify that the video source is powered on and sending a signal.
- Ensure the video processor is properly configured and functioning.
Poor Image Quality:
- Adjust the resolution settings on your video source to match the native resolution of the LED panels.
- Check for any damaged cables that might be affecting signal quality.
- Use the video processor’s settings to fine-tune the display parameters.
Panel Malfunction:
- If an individual panel is not displaying correctly, check its power connection and Ethernet cable.
- Swap the panel with another in the chain to determine if the issue is with the panel or the signal path.
Conclusion
Setting up an LED screen to receive signals is a straightforward process once you understand the basics. By following these steps and tips, you can ensure a smooth setup and enjoy a high-quality display. Whether you’re using it for presentations, advertisements, or entertainment, a properly configured LED screen can make a significant impact. Enjoy your stunning LED display!
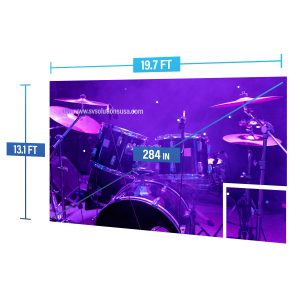
At SV Solutions, we recognize the significance of
crafting unforgettable experiences through seamless events.